Configuring Forms and Workflows
The template builder within Conforma is a simple way to configure and customise your system.
Users with Admin permissions are able to access the template builder and make changes to application forms, emails, and workflows. This section contains instructions for how to make some of the most common changes within template builder.
Viewing your templates
To navigate to the template builder go to the Configuration drop-down menu, then click Templates/Procedures.

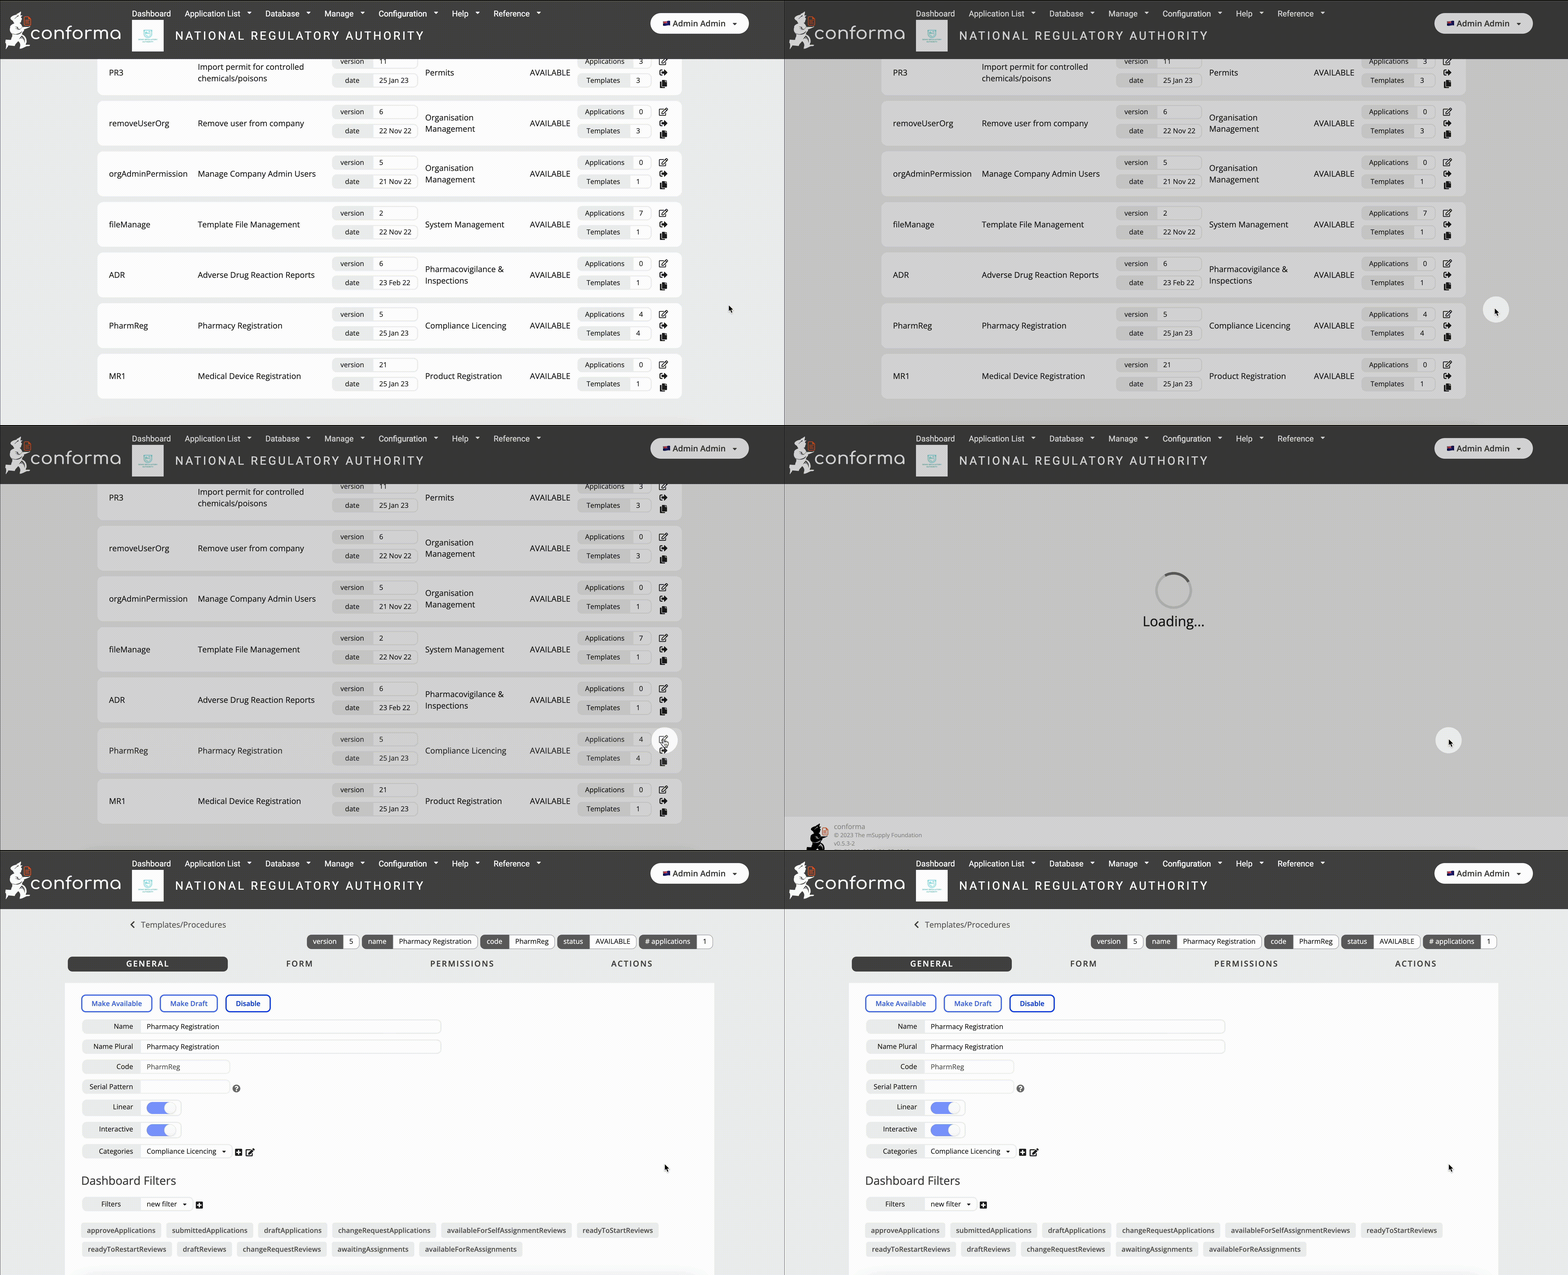
This displays a list of the templates (both active and inactive) in your system. Next to each template, there are three configuration icons that can be used to interact with the forms.

Renaming a field
Here is an example of how you can edit an existing form field.
-
Click the Edit button to view your selected template in the template builder. Form templates must be in ‘DRAFT’ status before they can be edited
-
But first you must check to see if there are any applications associated with the template

-
If there are no applications, click the Make draft button and jump to step 6
-
If there are associated applications, continue through the following steps
- Navigate back to the list of templates

-
Click the Duplicate button that corresponds to your template. This will create a new draft version of your template
-
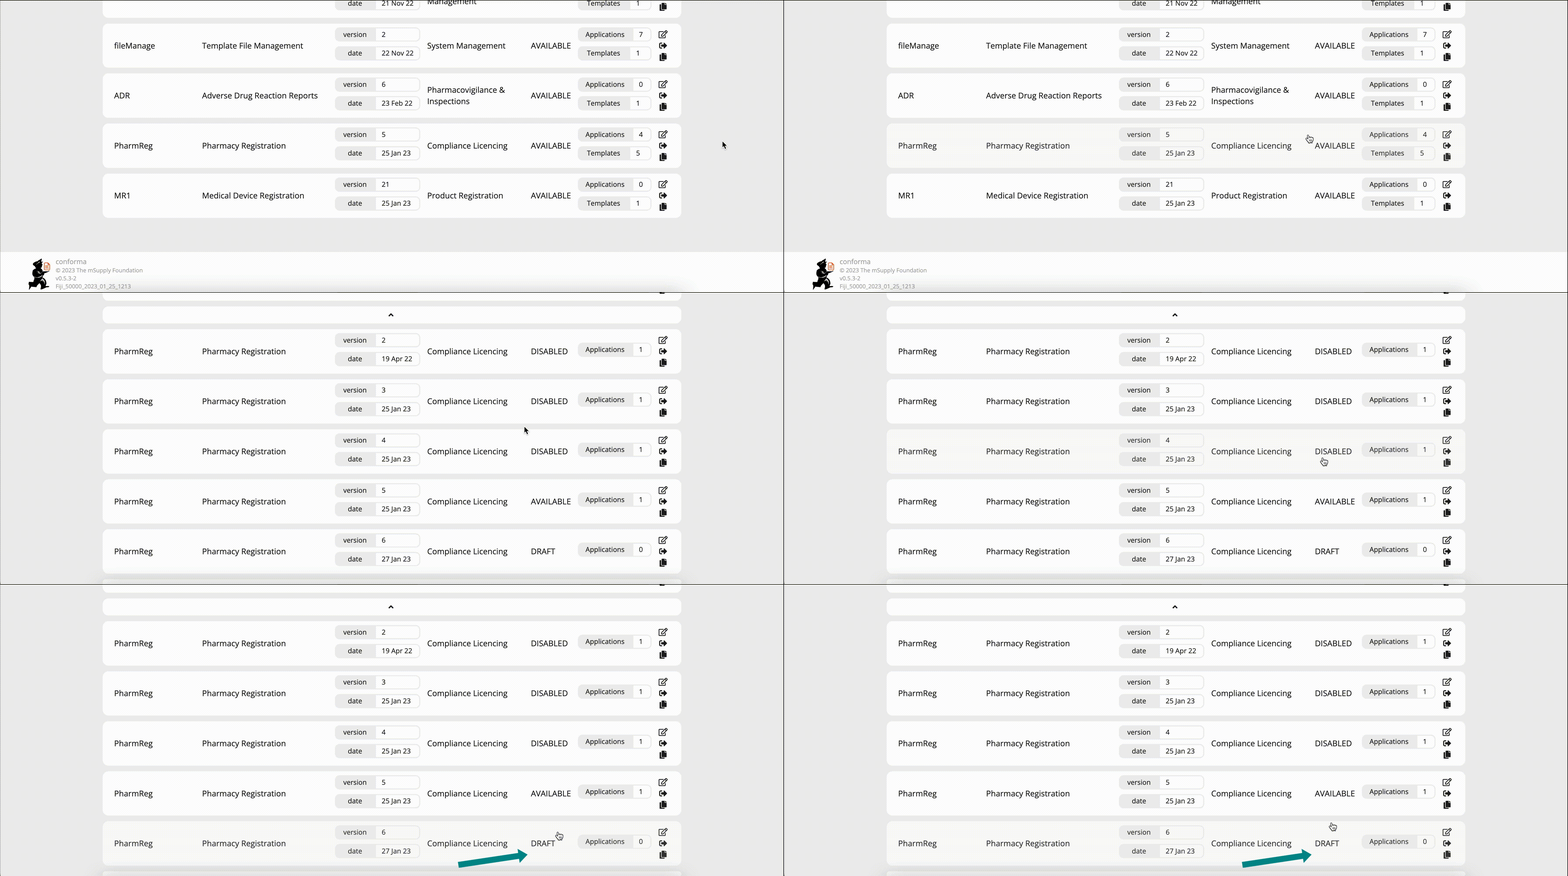
Click onto your template to expand and view the different template versions. Find the new draft version and click the Edit button
- Select the Form tab
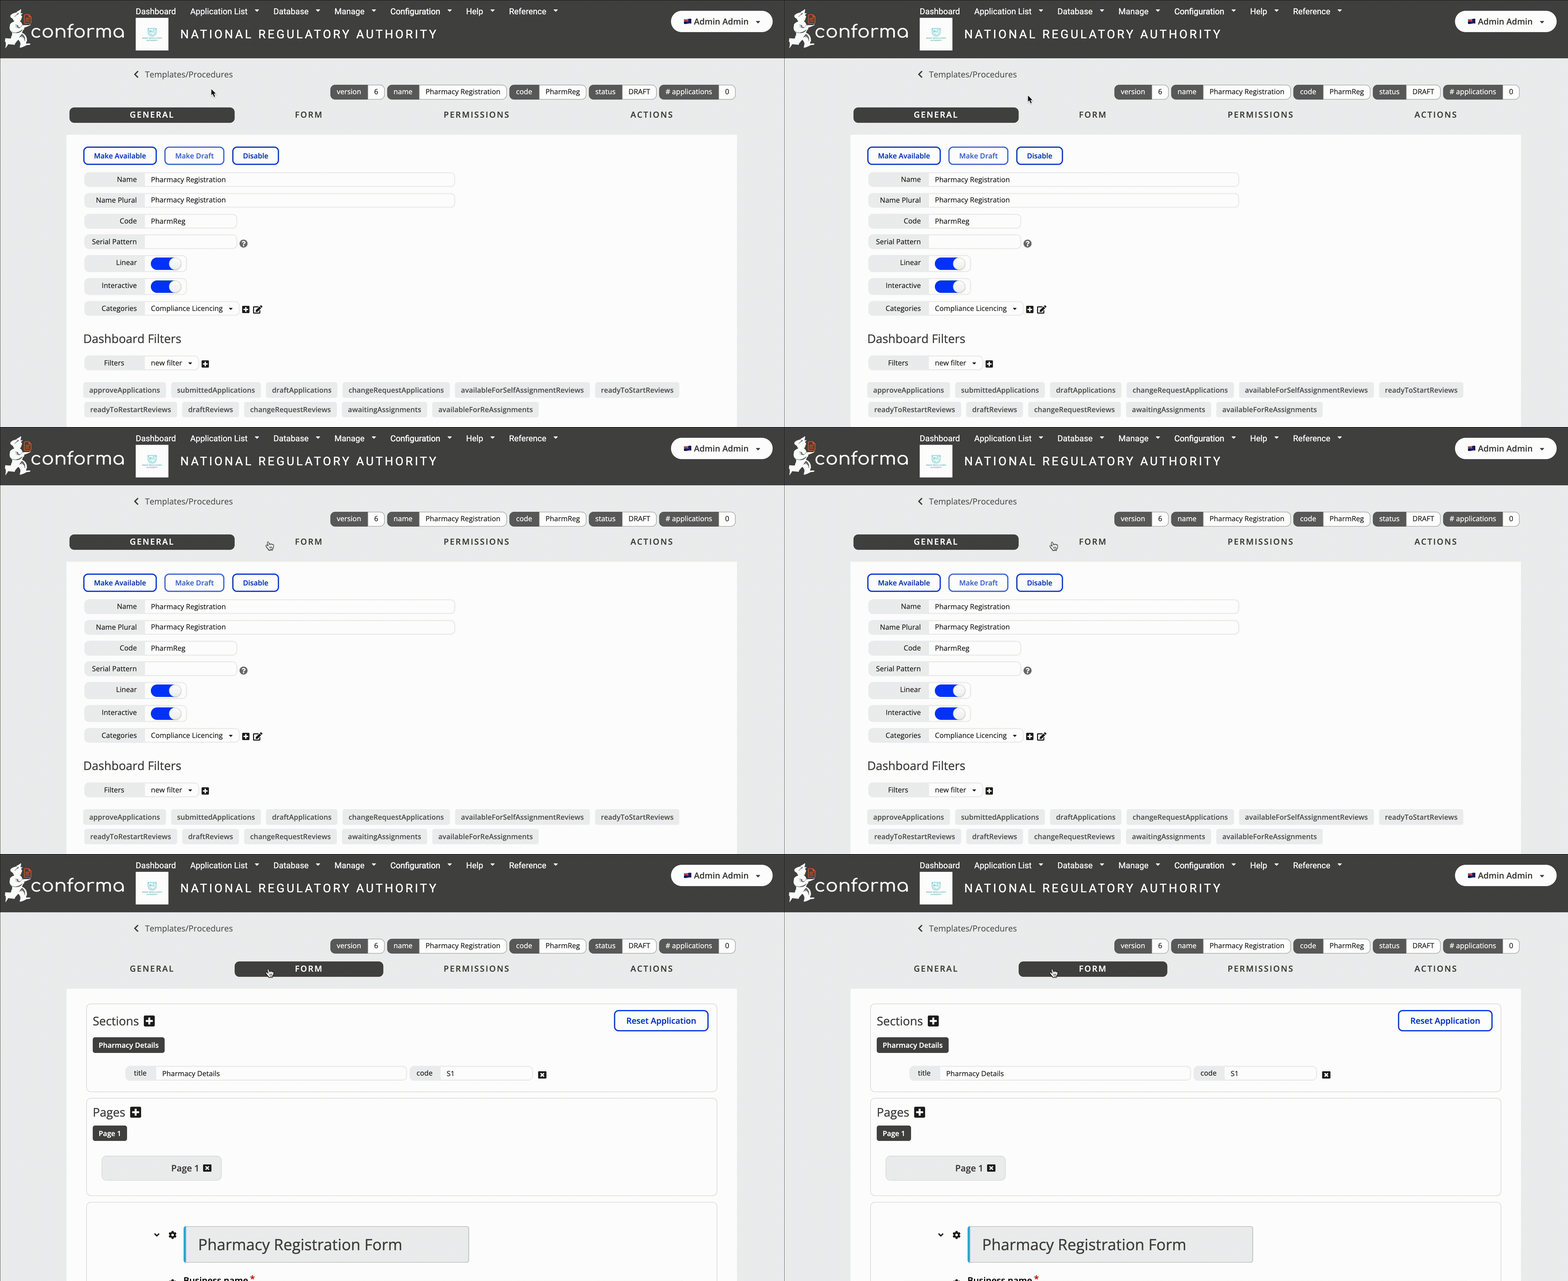
- Under the Form tab, you can see the different sections of the Form Template. Select the one containing the element you wish to edit. For this example there is only one section: 'Pharmacy Details'

- Next, select the page containing the element you wish to edit. In this example, it is in Page 1

- You will now see a preview of the Form Template and its elements. Click the cog icon next to the element you wish to edit
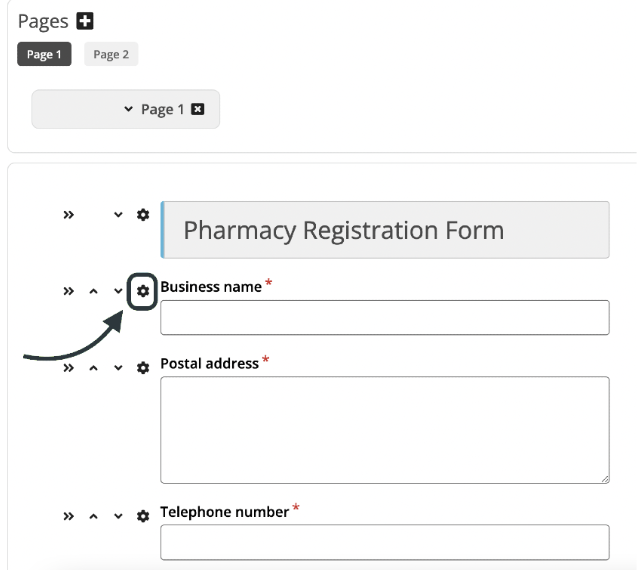
- A new screen will appear. This is where you can edit all the parameters that govern the appearance and behaviour of the element. Once your changes have been made, click Save and then Close
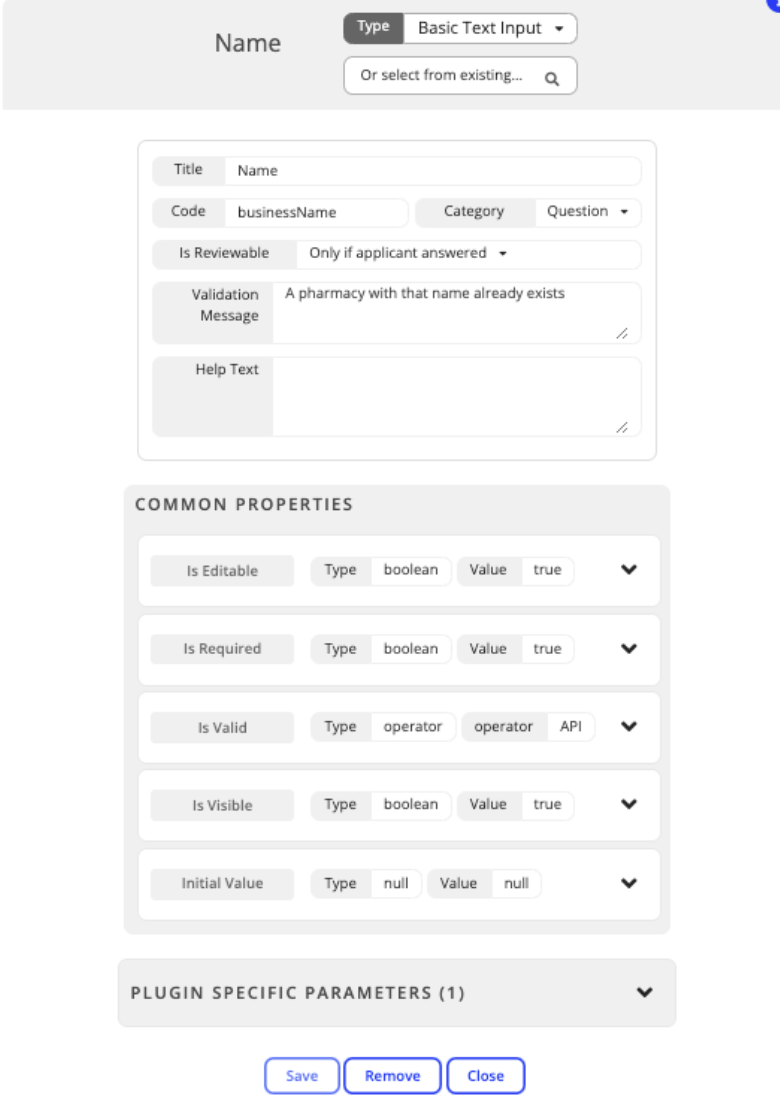
- To change the title, expand the ‘Plugin specific parameters’ box by clicking on the down arrow.
Creating a new element
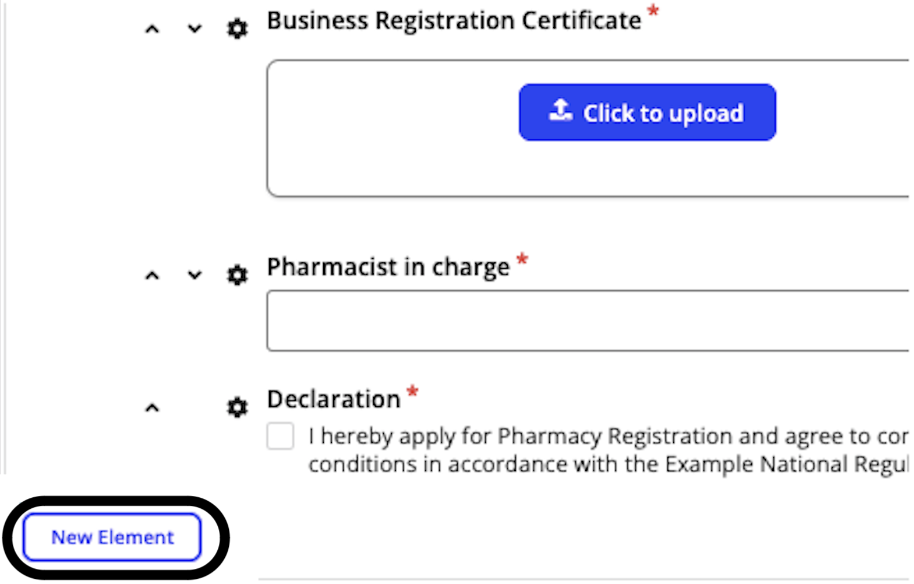
- To add a new element to an application form, scroll to the bottom of the page and section of the form you are working on and select New Element
-
Begin editing the properties of the new element by clicking the cog icon
-
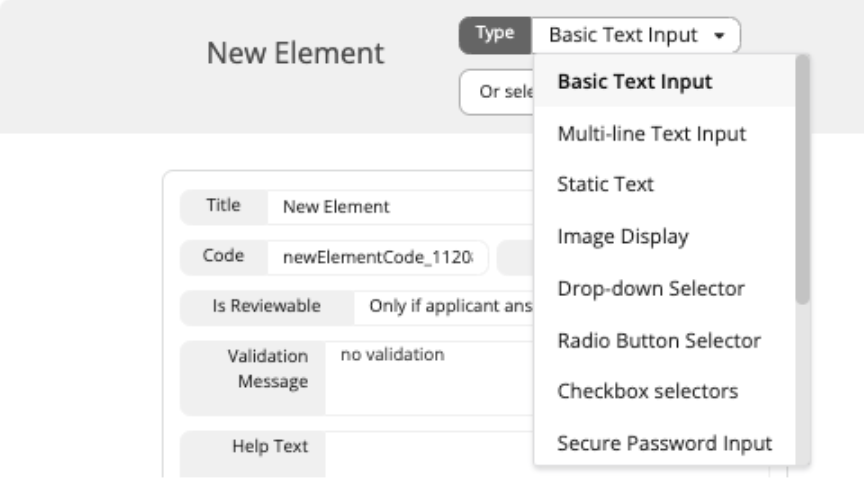
You can choose from a number of element types from the drop-down at the top
-
You can then create the element to add to your application form, before selecting Save and then Close
-
For further information on creating new elements, check out our developer docs.
Changing permissions on a template
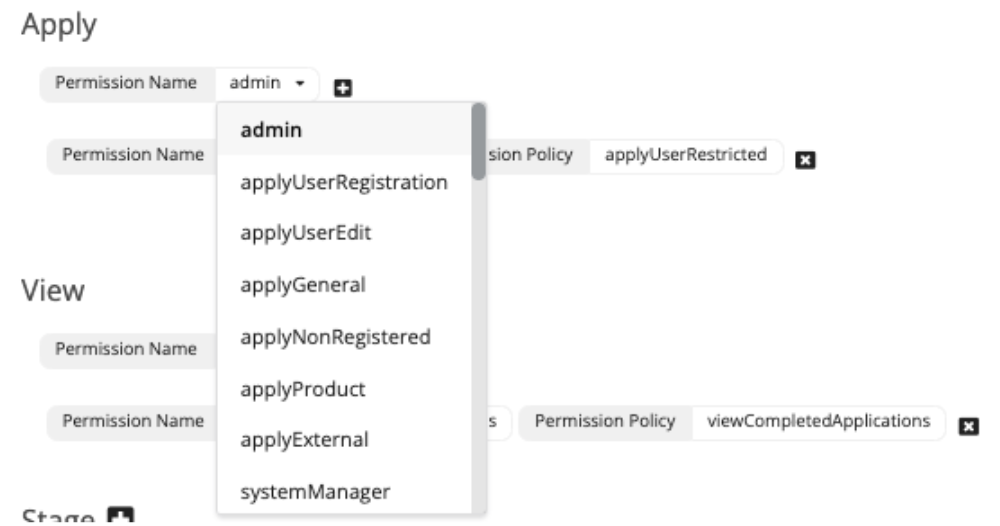
Permissions to allow users to apply, assign, view, or review applications can be managed under the Permissions tab.
-
An ‘apply’ permission will allow applications to create new applications
-
A ‘view’ permission allows supervisors of reviewers to view all submitted reviews
-
Both of these types of permissions can be easily added by selecting a pre-existing type from the dropdown
-
Assign and review permissions are more complex as there are a number of options available, which allows for very customised form/application development. These can be added in the same way as apply and view permissions but using stages to create the desired workflow
-
For further information on adding or managing permissions, check out our developer docs.
Changing actions on a template
The Actions tab of the template builder allows users to create actions specific to the application type being configured.
- To add a new action, select the type of trigger you want the action to occur as a result of using the drop-down selection
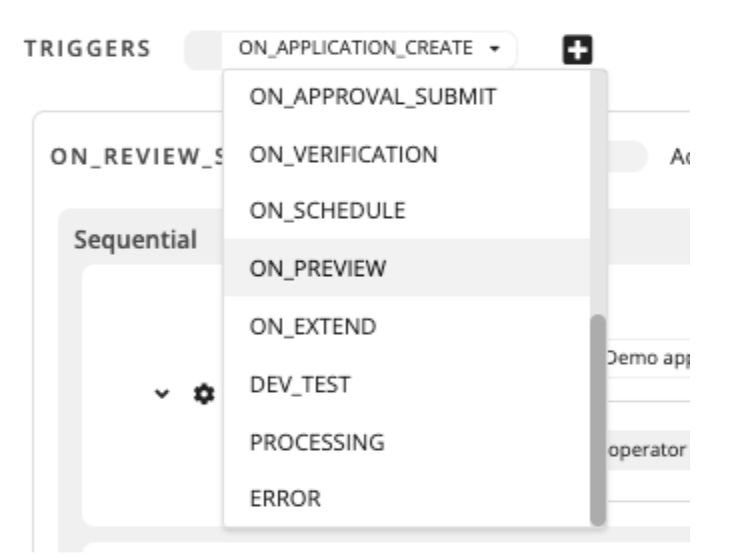
- Select the plus icon to add that trigger

- With the new trigger established, you can then add the desired action by selecting the Add Action button under next to the newly generated trigger

- Use the cog icon to edit and configure the action in the pop up, before selecting Save and then Close. Actions can be independent or part of a sequential process in the application
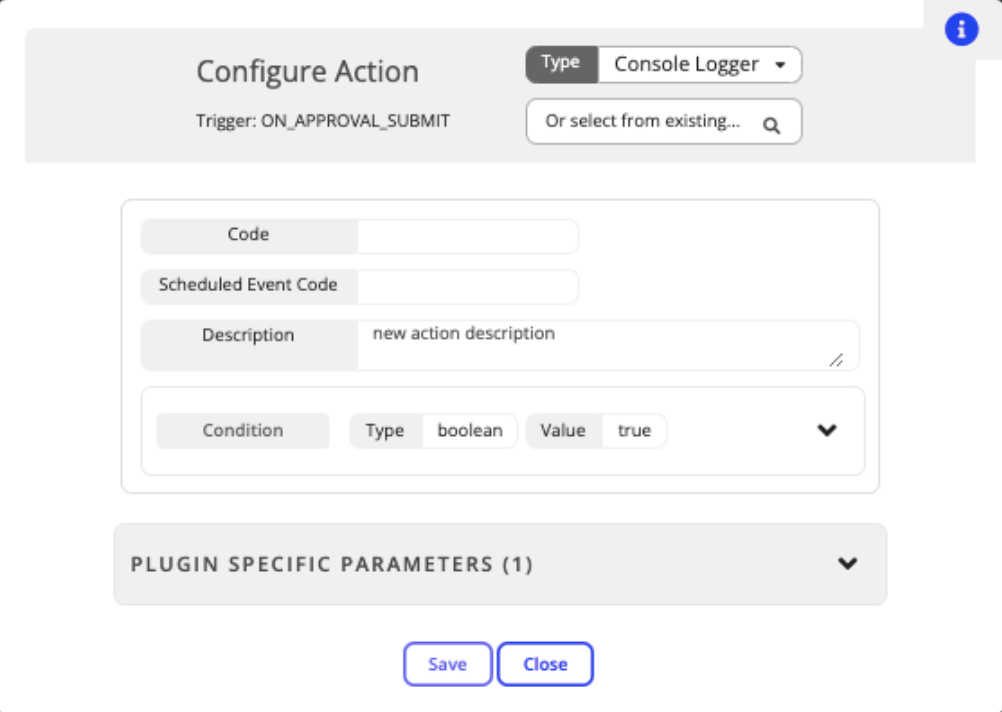
- For further information on adding or managing actions, check out our developer docs.