Configuring Languages
All the strings that make up the Conforma system (except for the forms, which are managed separately), can be localised into different languages.
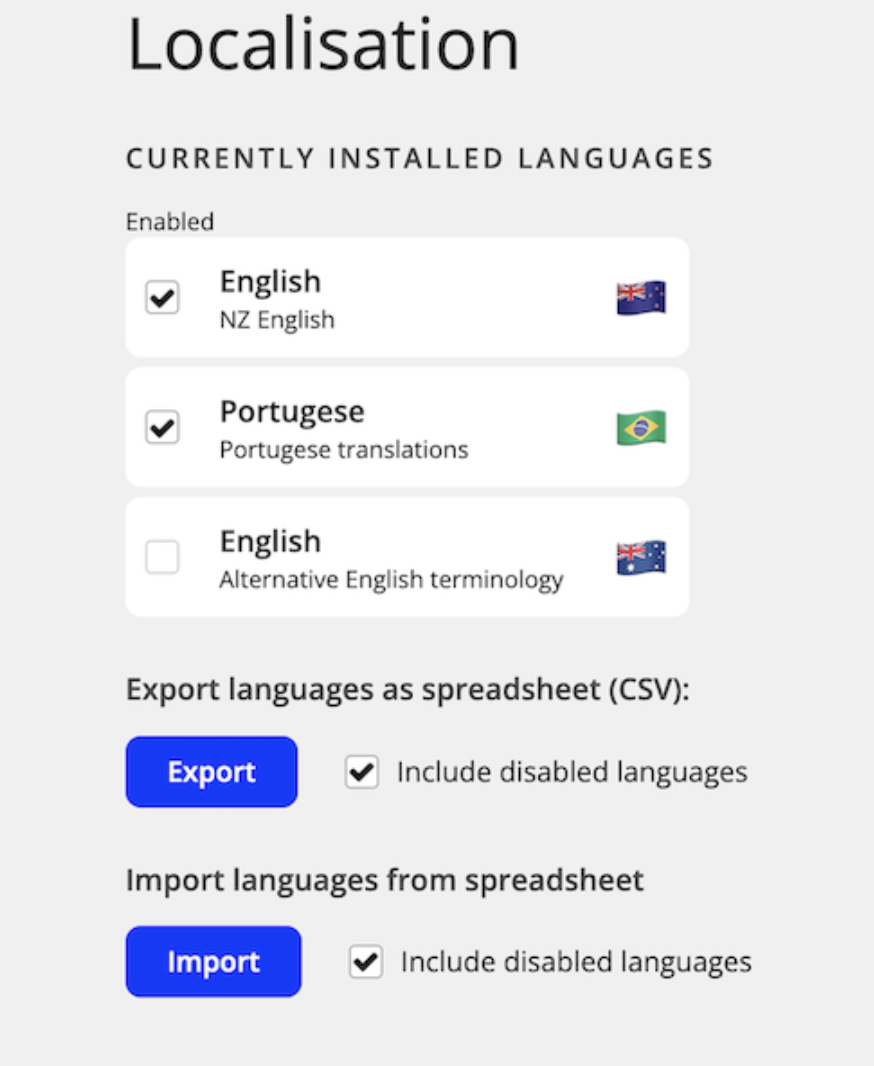
In the Conforma localisations configuration page, you can export and import the file that lists all the words in each language for use in the system. You can also manage languages by enabling/disabling them within the application.
Enabling a language
- In the menu bar, go to the Configuration drop-down menu, then click Localisations
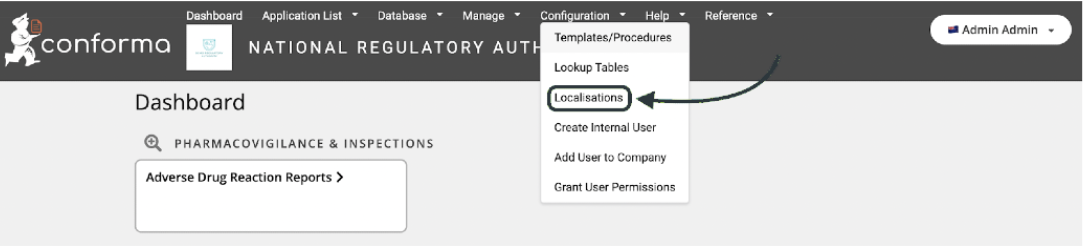
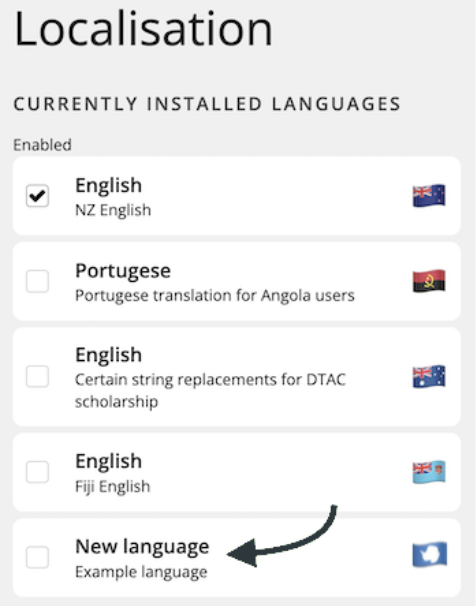
- The available languages will be displayed. Check the box of any languages you wish to enable.
If multiple languages are enabled, users will be able to select the language they wish to operate with from the homepage:
-
In the top right corner of the screen click the drop-down menu next to your user details.
-
Click Change Language
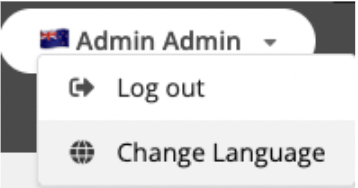
- Once you select your preferred language, it will update automatically. You can always change it back using the same method.
Viewing the localisation strings
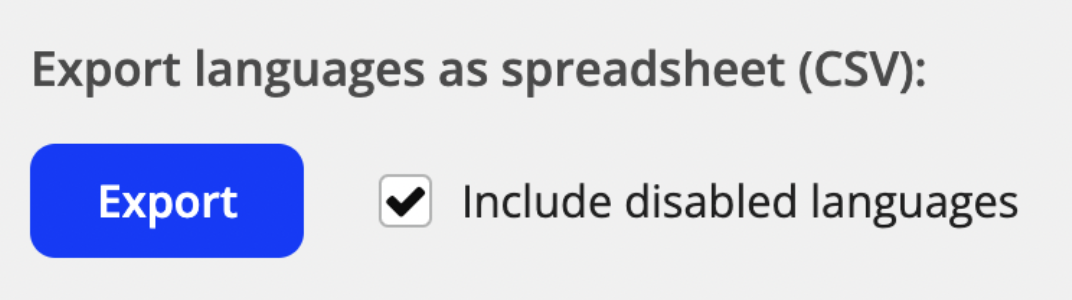
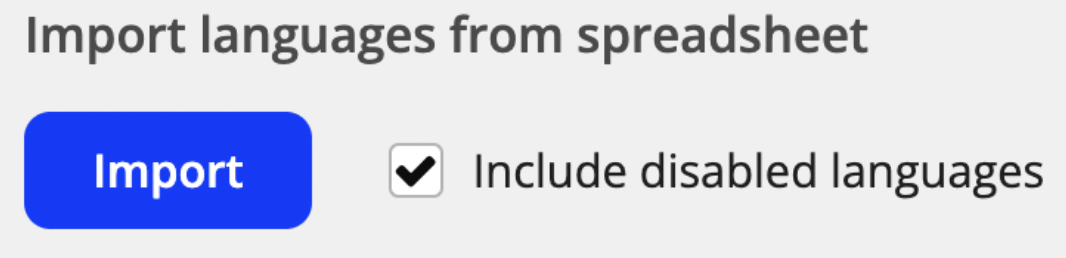
Under localisations, you can use the Export button to download and view a .csv of the configured language strings and translations.
Editing strings for an existing localisation
-
Under localisations, export the currently configured languages .csv file
-
Within the .csv, edit the strings as required and save the updated file (we recommend doing this in Google Sheets or Microsoft Excel)
-
Then click the Import button and upload the updated .csv file. Your changes will now be implemented.
Adding a new language
-
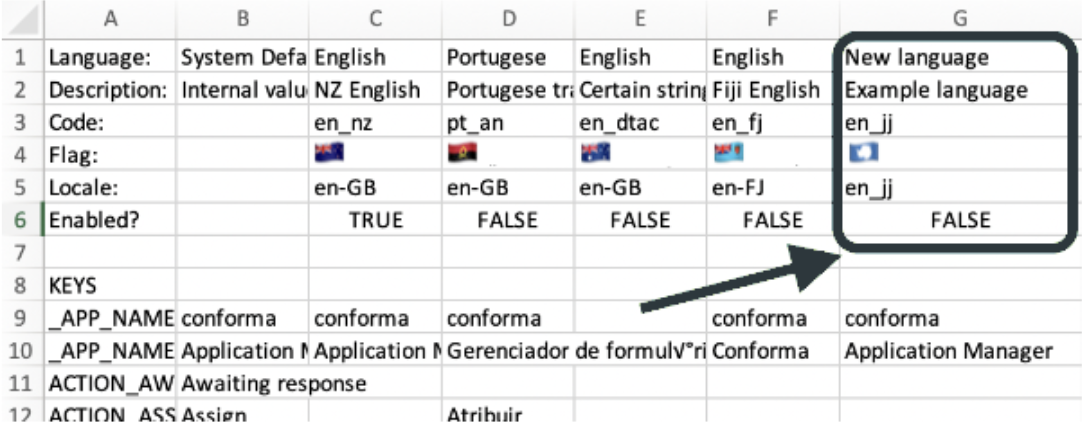
Under localisations, export the currently configured languages .csv file
-
Within the .csv, fill out a new column to include the basics about the language you wish to include in the system including the name, description and whether the language is to be enabled
-
Within the new column, enter in the translated strings. If a cell is left blank, it will default to the default system string
-
Once you have completed entering the required strings for your new localisation language, save and import the file. Be sure to save the file with the exact same name as when you downloaded it
-
The new language will appear within the languages configuration page and can then be enabled for use.
To learn more about how localisation works in Conforma, check out our developer docs.